


Summary
Garage door maintenance takes under an hour a few times a year and prevents most breakdowns. The core DIY tasks are lubricating moving parts, cleaning the sensors, tightening hardware, replacing worn seals and testing the balance and auto-reverse. Spring, cable and track repairs involve dangerous tension and belong with a trained technician.
It All Starts With Garage Door Maintenance and a Few Simple Checks
Your garage door is the largest moving object in your home, and it relies on springs holding hundreds of pounds of tension. Regular garage door maintenance keeps that system quiet, reliable and safe.

An average door cycles about 1,500 times a year, wearing down rollers, hinges, cables and the opener with every trip. A few dollars of lubricant now beats a few hundred for a snapped spring later. If yours already sticks, drafts or groans, start with the most common garage door problems and their fixes.
Step-by-Step Garage Door Maintenance That Prevents Breakdowns
These garage door maintenance tips cover the preventive maintenance you can handle with a ladder, rags, a socket wrench and lubricant. First, run the door through a full cycle and note any jerking, scraping or grinding. Then work with the door closed and the opener unplugged unless a step says otherwise.

Clear the Tracks of Debris and Check Them for Straight Alignment
Dirt and debris in the vertical tracks slow the rollers and cause jerky travel. Wipe each track with a damp rag, but skip the grease, because lubricant on tracks traps grit. Then sight down each one for dents, bends or loose brackets, since a warped section needs a technician.
Clean and Align the Photo Eye Sensors for Reliable Safety Stops
The photo eyes sit no more than six inches above the floor on each side of the opening, and dust or a bumped bracket keeps the door from closing. Wipe both lenses with a dry cloth, then check the indicator lights: steady on both units means aligned, while blinking means one is off target. Loosen the wing nut and adjust until the light holds, or follow this walkthrough on how to align garage door sensors. If a sensor still blinks after cleaning and adjusting, replace it.
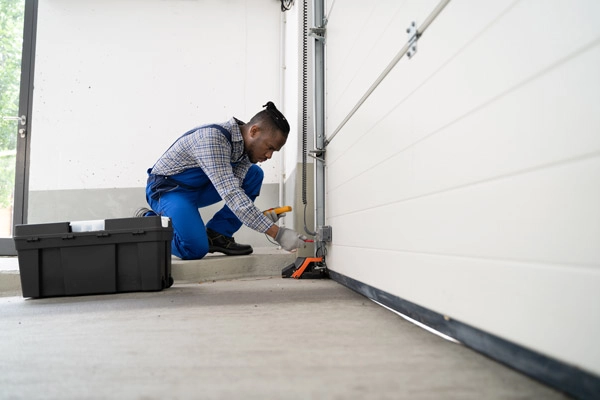
Lubricate Moving Parts to Reduce Friction, Noise and Early Wear
Regular lubrication is the cheapest way to extend your door's life. It cuts friction, quiets squeaks, keeps rust off steel and eases the load on your opener. Every three to six months, apply silicone spray or white lithium grease to these spots:
- Hinge pivot points
- Steel roller bearings
- Torsion springs and the bearing plates at each end
- The chain or screw on chain and screw-drive openers
Skip nylon rollers, plastic parts and belt drives. WD-40 cleans well, but it evaporates too fast to protect anything. For the right technique on each part, follow this guide on how to lubricate a garage door.
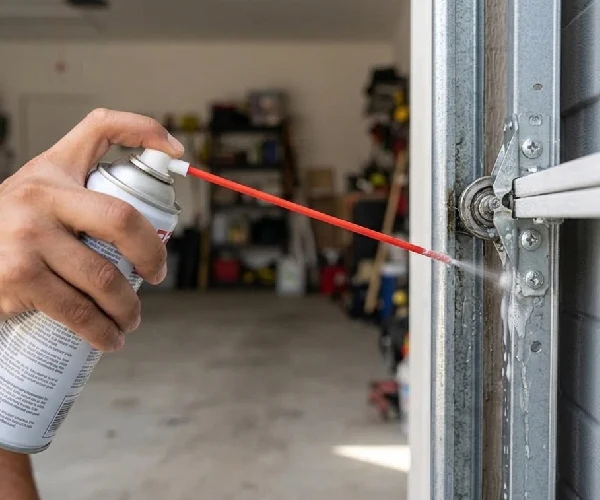
Quick Tip
Wipe off excess lubricant right after you apply it. Drips collect dust and turn into the same grit that wears down rollers and hinges.
Maintain Rollers and Hinges So Your Door Runs Quietly and Smoothly
Rollers and hinges move every time the door does, so they wear out fastest. Replace cracked hinges and any roller that wobbles, grinds or shows flat spots; standard steel rollers last about 10,000 cycles, or roughly seven years. Nylon rollers with sealed bearings run much quieter, but leave the bottom pair to a pro because they connect to the cable brackets.
Tighten Hinges, Brackets and Bolts Without Stripping the Holes
Vibration shakes hardware loose over time. Every three to six months, snug the hinge bolts, track brackets and opener mounting straps with a socket wrench, stopping once each bolt resists so you don't strip the steel. Never loosen the bottom corner brackets or any bolt painted red, because they hold the cables under full spring tension.
Inspect Weatherstripping and Replace Seals That Let In Air or Water
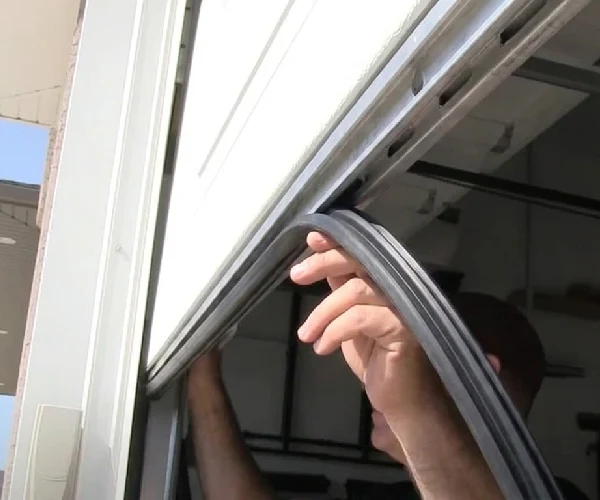
Close the door and look for daylight, cracks or flattened rubber along the bottom seal and side stop molding. Gaps let in drafts, water and pests, and this guide to fixing a leaking garage door helps you trace the source. Bottom seals come in lengths that match standard garage door sizes, so measure your door's width before you buy. Replacing a retainer-style bottom seal takes about 20 minutes:
- Raise the door to waist height and unplug the opener.
- Slide the old seal out of the bottom channel.
- Spray the channel with soapy water so the new seal glides in.
- Feed in the new seal and trim it, leaving half an inch past each end.
- Plug the opener in, close the door and confirm the seal meets the floor evenly.
Check the Door Balance by Disconnecting the Opener From the Door
Springs lose tension with age, cables stretch and drums wear unevenly, and each one throws the door off balance. An unbalanced door rises crooked and forces the opener to do the springs' job. Test it this way:
- Close the door completely.
- Pull the red emergency release cord.
- Lift the door by hand to about waist height and let go.
- Reconnect the trolley following your opener's manual.
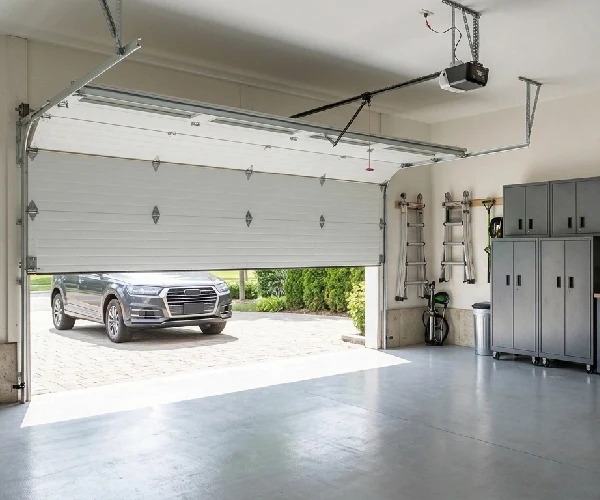
A balanced door stays put or drifts slightly; if it drops or shoots up, call a pro to adjust the springs. Always pull the release with the door closed, since a broken spring lets the door fall hard. The same cord lets you run the door by hand during a power outage.
Wash the Door Surface With Care Based on Its Material and Finish
Road salt and grime wear down finishes, so wash the door twice a year with mild soap and a hose, never a pressure washer. On steel doors, touch up scratches and treat rust early with these ways to remove rust from a garage door. Refinish wood doors once the finish cracks or peels, and clean the glass on full-view models with a nonabrasive cleaner.
Garage Door Opener Maintenance That Keeps Automatic Doors Safe
An automatic opener doubles as a safety device. Federal rules have required auto-reverse and photo eye protection on residential openers since 1993, and those features only help if they work. Run these tests once a month:
- Auto-reverse: Lay a 2x4 flat in the door's path and close the door. It should reverse on contact.
- Photo eyes: Pass a broom handle through the beam as the door closes. It should stop and reopen.
- Force: Hold the bottom edge as the door closes. If it doesn't reverse with light resistance, adjust the force setting per the manual.
Replace remote batteries yearly, tighten the motor's ceiling mounts and lubricate chain or screw rails, while belt drives run dry. Check chains for sag and belts for cracks or fraying. If a test fails, stop using the opener and review these important garage door safety tips with your household.
Signs Your Garage Door Torsion Springs Are Nearing the End of Life
Standard torsion springs are rated for about 10,000 cycles, so a door used four or five times a day wears them out in around six years. Watch for these signs:
- A visible gap in the coil, which means the spring has already broken
- Rust or flaking on the coils
- A heavy door that won't stay open halfway
- Jerky or crooked lifting
- Frayed or slack cables at the bottom corners
- An opener that strains or stops partway up
Never adjust or replace torsion springs yourself, since they store enough energy to break bones. Use this guide to troubleshoot faulty garage door springs so you can describe the issue clearly when you call a technician.
Troubleshooting a Noisy or Jerky Garage Door by Sound and Motion
Most garage door noises trace back to a short list of causes. Match what you hear or see to the table below, then handle the fix or call a technician.
| Symptom | Likely Cause | What to Do |
|---|---|---|
| Squeaking | Dry hinges, rollers or springs | Lubricate moving metal parts |
| Grinding | Worn roller bearings or dirty tracks | Clean tracks, replace rollers |
| Rattling | Loose hardware or a slack chain | Tighten bolts, check chain tension |
| Loud bang | A broken spring | Stop using the door, call a pro |
| Jerky motion | Dirty or bent tracks, worn rollers | Clean tracks; call a pro for bends |
| Uneven lifting | Unbalanced springs or a frayed cable | Run a balance test, call a pro |
| Stops or reverses partway | Blocked sensors or off travel settings | Clean sensors, adjust limits per the manual |
A door that jumps its track is a hazard, so follow these steps when your garage door comes off track. Don't run the opener again until the door is back on its track and balanced.
Seasonal Garage Door Care for Midwest Winters and Humid Summers
Winter Garage Door Maintenance Steps for Cold Climate Regions
Cold thickens grease, stiffens seals and makes metal brittle. Book a garage door tune-up in the fall, before the first hard freeze, and add these steps:
- Switch to silicone lubricant, which stays slick below freezing.
- Spray the bottom seal with silicone so it won't freeze to the concrete.
- Keep snow and ice clear of the threshold and photo eyes.
- Free a frozen seal before pressing the button to protect the motor.
These tips to prevent your garage from freezing shut round out your cold-weather prep. Pair them with a fall tune-up for a door that runs smoothly all season.
Protecting Tracks, Springs and Opener Electronics From Humidity
Summer humidity rusts tracks, springs and fasteners and condenses on opener circuit boards and sensor lenses, which makes remotes and sensors act up. Wipe steel parts dry after storms, keep them lightly lubricated and plug the opener into a surge protector. Airflow helps most, so follow these steps for lowering humidity in your garage.
Your Garage Door Maintenance Checklist by Month, Quarter and Year
A simple schedule keeps garage door upkeep from slipping through the cracks. Use this checklist as a baseline and shorten the intervals if your door runs more than five times a day.
| How Often | Tasks | Who |
|---|---|---|
| Monthly | Watch a full cycle, test auto-reverse and photo eyes, wipe sensors, clear tracks | DIY |
| Every 3 to 6 months | Lubricate, tighten hardware, inspect rollers and seals, test balance | DIY |
| Twice a year | Wash the door, prep for winter in fall, check for humidity damage in spring | DIY |
| Annually | Replace remote batteries, inspect the finish, schedule a spring and cable inspection | DIY and pro |
Annual maintenance for a garage door is also a good time to note its age. Most doors last 15 to 30 years and openers 10 to 15, so start planning once yours nears the upper range.
DIY Garage Door Maintenance vs Hiring a Pro: Cost and Safety
Learning to maintain a garage door yourself costs little more than a can of lubricant and an hour of your time. A professional visit costs more, but it covers the high-tension parts you shouldn't touch.
| Task | Typical Cost | Who Should Do It |
|---|---|---|
| Lubrication and cleaning | $10 to $20 in supplies | DIY |
| Sensor cleaning and alignment | Free | DIY |
| Bottom seal replacement | $20 to $50 in parts | DIY |
| Professional tune-up | About $75 to $200 | Pro |
| Torsion spring replacement | About $150 to $350 | Pro only |
| Cable or track repair | Varies with the damage | Pro only |
A basic garage service visit usually covers lubrication, hardware tightening, balance adjustment, safety testing and a spring and cable inspection. Prices vary by region and door size, so ask for an itemized quote before you book.
Quick Garage Maintenance Tips for Floors, Walls and Everything Else
The door gets the most wear, but the rest of the space needs attention too. Fold these garage maintenance tasks into your regular home maintenance routine.

- Floor: Sweep and wash the concrete regularly, patch cracks early and compare the best garage flooring options for lasting protection.
- Walls, roof and foundation: Moisture stains near the floor or ceiling mean a leak, so fix it fast before mold sets in.
- Windows and entry doors: Frames that stick or sit unevenly can signal a settling foundation.
- Pests: Seal gaps where the walls meet the floor and roof to keep mice, ants and termites out.
- Storage: Keep bins, bikes and tools out of the door's path and away from the photo eyes.
Get Started With Feldco on a New Garage Door for Your Midwest Home
Maintenance adds years to a door, but no tune-up fixes rusted panels, cracked sections or a tired design. When repairs start piling up, a new insulated overhead garage door brings back quiet, reliable operation and instant curb appeal. See what to expect when you replace your garage door.
Feldco has been the Midwest's #1 home exterior company since 1976, serving over 500,000 homeowners across Illinois, Wisconsin, Indiana, and Iowa. We've built over 100,000 garages and bring 50 years of trusted service to every project. Talk to a specialist and get your free quote today.
FAQs
How often should a garage door be serviced?
Do quick safety checks monthly, lubricate and tighten hardware every three to six months and book a professional inspection once a year. Doors that cycle more than five times a day benefit from a pro visit twice a year.
Can regular maintenance extend the life of a garage door opener motor?
Yes. A balanced, well-lubricated door lifts easily, so the motor and gears work less and last closer to their full 10 to 15 years.
Is overhead garage door maintenance worth the time and money?
Yes. Routine overhead garage door maintenance costs a fraction of a spring or opener replacement and catches safety problems before they cause injuries.
How long does garage door maintenance take?
A DIY session takes 30 to 60 minutes. A professional tune-up usually wraps up in about an hour.


 866-4FELDCO