


Summary
Sealing a concrete garage floor takes about a weekend: clean and degrease the slab, run a moisture test, then roll on two thin coats of sealer between 50°F and 90°F. Acrylic sealers last 1-3 years, while penetrating sealers and epoxy or polyurethane coatings last 5-10 years. Most sealed floors handle foot traffic in 24 hours and vehicles in 2-7 days.
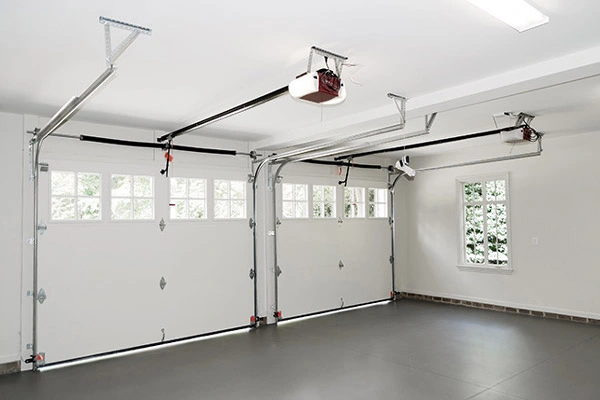
Sealing Turns a Worn Garage Floor Into a Durable Workspace
Your garage floor takes more abuse than any other surface in your home. Cars, lawnmowers, bikes, and seasonal equipment track in dirt, road salt, and oil all year, so it's no wonder the surface ends up cracked, stained, and dull. Garages aren't meant to be the prettiest space in the house, but they don't have to feel dingy and uncomfortable, either.
Learning how to seal a garage floor is one of the simplest ways to protect garage floor concrete and turn the space into a proper workshop. Bare cement is porous, so it soaks up water, oil, and de-icing salts that slowly break it down. A quality sealer blocks those liquids at the surface and makes cleanup a breeze.
Floor Sealers: Picking the Right Garage Floor Sealant Type
Knowing which floor sealer to use is key. Concrete is the most common garage flooring material, and for it you can choose acrylic, epoxy, or polyurethane products. These topical sealers fill the concrete's pores and leave a glossy film that's durable and easy to clean.
You can also use silane or siloxane formulas, which soak into the concrete and bond with it to repel water and chemicals. They don't add shine; instead, they leave the floor looking natural while protecting it from within. Which one you pick comes down to the look you want and how hard you use the space. Here's how the main types of garage floor sealant compare:
| Sealer Type | Finish | Typical Lifespan | Best For |
|---|---|---|---|
| Acrylic | Wet-look gloss or satin | 1-3 years | Budget-friendly shine and quick recoats |
| Epoxy | Thick, high-gloss coating | 5-10 years | Workshops and heavy daily use |
| Polyurethane | Glossy, scratch-resistant | 5-10 years | Topcoat over epoxy in sunny garages |
| Silane/siloxane (penetrating) | Invisible, natural look | 5-10 years | Water, salt, and freeze-thaw protection |
Lifespans depend on the product, your prep work, and how much traffic the floor sees. For a tougher finish that cures in about a day, look into a polyaspartic floor coating. It costs more than acrylic, but it stands up to hot tires and won't yellow in sunlight.
Surface Preparation: Clean and Test Before You Apply Sealer
The biggest mistake you can make when sealing concrete garage floor surfaces is rushing the prep. Sealer only bonds to clean, dry concrete, so leftover dirt and residue lead to peeling, cloudy patches, and a finish that won't hold up. Follow these steps to prep your garage floor before sealing:
- Sweep the floor with a large broom to clear away dirt and debris.
- Remove any oil and grease stains (see the steps below).
- Scrub the floor with a concrete cleaner.
- If you're using epoxy or another thick coating, etch or grind the surface so the coating can grip.
- Power wash the floor to rinse away all cleaner residue.
- Let the floor dry completely, usually 24-48 hours, before you apply sealer.
Removing Old Oil and Grease Stains From Concrete Before Sealing
Oil and grease keep sealer from bonding, so any stain you skip turns into a blotchy, unprotected spot. For fresh drips, cover the oil with cat litter, grind it in with your shoe, and sweep it up after a few hours. Then apply a concrete degreaser and scrub with a stiff nylon brush.
Older, set-in stains take a few rounds. Spread a poultice (an absorbent powder mixed with degreaser) over the spot and let it pull the oil out for 24 hours. Rinse well and sprinkle water on the area; if it still beads up, repeat the process.
Testing Concrete Moisture With a Simple Plastic Sheet Test
Concrete can look dry on top and still hold moisture underneath. Seal over it, and trapped vapor pushes up against the sealer, causing bubbles, peeling, or a white haze.
To check, tape an 18-by-18-inch square of clear plastic to the floor and seal all four edges with duct tape. Leave it in place for 16-24 hours, then lift it and look for condensation on the underside or darkened concrete beneath it.
If you see moisture, give the slab more time to dry and fix any drainage problems before sealing. Breathable penetrating sealers handle a little dampness better than film-forming coatings. For an exact reading before an epoxy job, use a calcium chloride test kit, which measures how much vapor the slab releases.
Quick Tip
Never skip the moisture test. Trapped moisture is one of the top reasons garage floor sealers peel, and checking costs you nothing but a sheet of plastic and a day.
Choose the Right Conditions to Seal Garage Concrete Floors
Read the instructions for your sealer carefully before you apply it, since every product lists its own application window. Most sealers won't perform well at 50°F and below, so plan for air and surface temperatures between 50°F and 90°F. Check the overnight low, too, because temperatures need to stay above 50°F while the sealer dries.
Pick a dry stretch with no rain in the forecast for at least 24 hours, and skip humid, muggy days that slow drying and cloud the finish. Keep direct afternoon sun off the slab as well; a hot surface dries sealer too fast and leaves roller marks. Late spring and early fall usually offer the best mix of mild temperatures and low humidity across the Midwest.
You'll also need to clear everything out of your garage for the full project, which takes a whole weekend depending on conditions. Plan ahead for where your car, tools, and storage will go.
Safety Precautions and Ventilation for Sealing Your Garage
Many garage floor sealers, especially solvent-based acrylics and epoxies, give off strong fumes while they dry. Good airflow and the right gear protect your lungs, skin, and eyes. Before you open a can, take these precautions:
- Open the garage door and any windows, and set a box fan to blow air out of the space.
- Wear a respirator with organic vapor cartridges for solvent-based products; a basic dust mask won't filter fumes.
- Use chemical-resistant gloves and safety goggles, especially when handling degreasers and etching solutions.
- Turn off pilot lights on any water heater or furnace in the garage, because solvent vapors are flammable.
- Keep kids and pets away until the sealer is dry and the odor clears.
Water-based sealers give off far less odor and fewer VOCs. They're a smart pick if your garage is attached to the house.
Apply the Sealer: Step-by-Step Instructions for Concrete Floors
Gather your supplies before you open the sealer, because once the first coat goes down, you won't want to stop. Here are the tools you'll need:
- Sealer of your choice
- Paint roller (lint-free) or paint sprayer
- Paint tray
- Paintbrush (optional) for edges and harder-to-reach areas
- Pressure washer or hose
- Large broom
- Protective gear: gloves, safety goggles, and a respirator
Work with plenty of circulation the whole time so you're not breathing in fumes. With your tools ready and the floor prepped, follow these steps for the first coat:
- Stir the sealer thoroughly and pour it into a paint tray, or load your sprayer.
- Cut in along the walls and edges with a paintbrush.
- Start in the corner farthest from the garage door and work in one direction so you don't box yourself in.
- Roll the sealer on in thin, even strokes, working in small sections and keeping a wet edge to avoid lap marks.
- Spread out puddles right away, since pooled sealer dries cloudy and soft.
- Let the first coat dry completely, following the manufacturer's drying time.
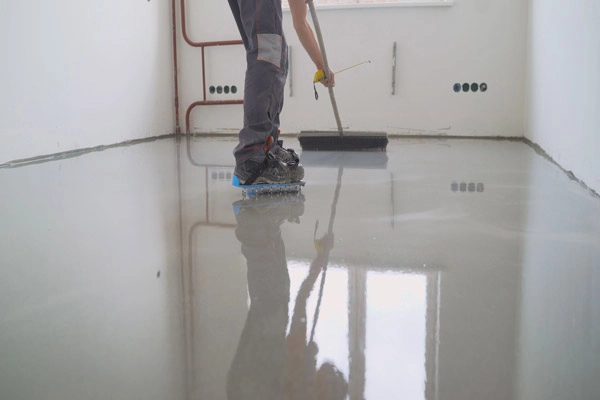
Adding a Second Coat for a Deeper, Glossier Garage Floor Finish
Most floors need a second coat of sealer, and that's where the rich, even gloss comes from. Two thin coats always look better and last longer than one heavy layer. Check the label for the recoat window first: many acrylics are ready in a few hours, while epoxies often need 12-24 hours.
Roll the second coat perpendicular to the first, so if you went north to south, go east to west. This cross-hatch pattern fills thin spots and evens out the sheen. Keep the coat thin, though, because extra sealer won't add gloss and can turn white or tacky.
If you'd like even more shine, apply floor wax over the finished, fully dried sealer. Just know that wax makes the floor slicker when it's wet.
Fill in the Cracks for a Smoother, Better-Protected Floor
Most garage floors still have a few cracks to address, especially older slabs that have taken years of abuse. A coat of sealer won't fill them on its own, so water and salt keep seeping in. A bead of caulk adds protection and gives the floor a clean, professional look.
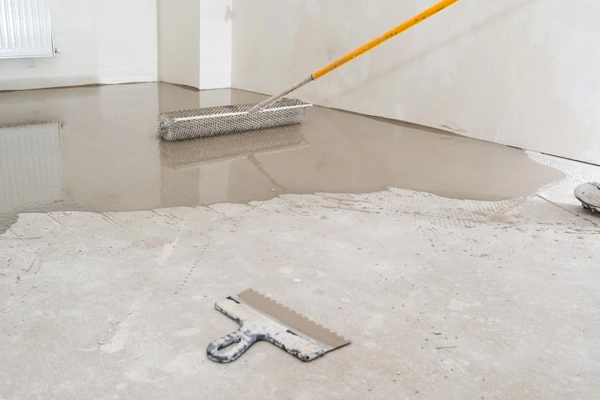
Fill hairline and narrow cracks with caulk made for concrete. Urethane products do the trick, or check the label to confirm the material is listed. Wide gaps, crumbling edges, or sunken sections need more than a bead of filler, so tackle a full garage floor crack repair before you seal.
Once the first coat of sealant is completely dry, cut a small bit off the tip of the caulk tube and hold the gun perpendicular to the floor. Press the tip into the crack and squeeze the trigger until the gap is full. You'll see the difference right away, and the cracks will blend into the floor.
Maintenance Habits That Keep a Sealed Garage Floor Looking New
A sealed floor is easy to care for, and a few simple habits add years to the finish. Most wear comes from grit, salt, and spills that sit too long. Build these into your routine:
- Sweep or dust-mop weekly so grit doesn't scratch the surface.
- Wipe up oil, antifreeze, and brake fluid as soon as you spot them.
- Rinse off road salt and slush through the winter, since salt slowly wears down the sealer.
- Mop with a pH-neutral cleaner when you clean garage floors, and avoid harsh solvents or acidic products that dull the finish.
- Set drip pans or mats under vehicles and use pads under heavy tool chests and equipment.
To tell when it's time to reseal, sprinkle a little water on the floor. If it soaks in and darkens the concrete instead of beading up, your sealer has worn thin.
When in Doubt, Hire a Professional to Seal Your Garage Floor
Sealing a garage floor takes time and effort. A basic acrylic or penetrating sealer makes a manageable DIY weekend, but some jobs call for a pro. Even a lack of time or storage space is a fair reason to hand it off.
Bring in help if your slab has wide cracks, spalling, or sunken sections, or if your moisture test keeps showing condensation. The same goes for peeling old coatings that need stripping. A multi-layer epoxy or polyaspartic system is also a pro job, since it requires diamond grinding and fast, precise application.
Professionals have the grinders, moisture meters, and experience to get it right the first time. That's often cheaper than stripping and redoing a failed DIY job.
Get Started With Feldco on a Garage Built to Handle It All
If your garage floor needs more than a fresh coat of sealer, Feldco also installs polyaspartic garage floor coatings. They cure in about a day, resist oil, salt, and hot-tire peeling, and keep their color in direct sun. Need a whole new space instead? We've built over 100,000 garages designed around the way homeowners actually use them.
We've served more than 500,000 homeowners across Illinois, Wisconsin, Indiana, and Iowa and have been the Midwest's #1 home exterior company since 1976. That's 50 years of trusted service behind every floor and garage we complete. Speak with a specialist and get a free quote today.
FAQs
How long does garage floor sealer take to dry and cure?
Most sealers dry to the touch in 1-4 hours and handle foot traffic within 24 hours. Wait 48-72 hours before parking on acrylic or penetrating sealers, and give epoxy about 7 days to fully cure before you drive on it.
How long does a sealed garage floor last?
Acrylic sealers typically last 1-3 years, while penetrating silane/siloxane sealers and epoxy or polyurethane coatings last 5-10 years. Heavy traffic, road salt, and skipped maintenance shorten that lifespan.
Can you reseal a garage floor over the old sealer?
Yes, as long as the new product is compatible with the old one, such as acrylic over acrylic, and you clean the floor thoroughly first. If you're switching to epoxy or another topical coating, you'll need to strip or grind off the old sealer so the new layer can bond.
Does sealing make a garage floor waterproof?
A good sealer makes concrete highly water-resistant, so surface water, snowmelt, and salt can't soak in. It won't stop water from leaking through large cracks or rising from a wet subgrade, so fix drainage and crack problems first.
How soon can you seal a new cement garage floor?
Wait at least 28 days for new concrete to cure before applying most sealers. Some penetrating and cure-and-seal products are made for fresh concrete, so check the label if you want to seal sooner.


 866-4FELDCO