


Summary
Most garage floor cracks come from concrete shrinkage, freeze-thaw cycles, or shifting soil, and hairline cracks with level edges are a manageable DIY fix. A lasting repair comes down to cleaning and widening the crack, using a filler matched to its width, and waiting 24 to 72 hours before driving on it. Cracks wider than 1/4 inch, edges at different heights, or gaps that keep growing point to foundation or drainage problems that need a pro.
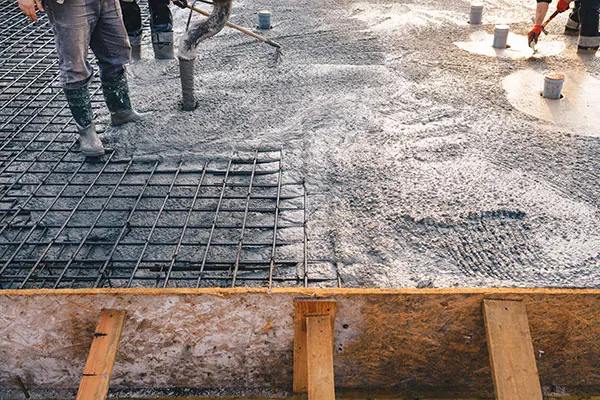
Common Causes of Garage Floor Cracking
A cracked garage floor rarely means hundreds of dollars in repairs or a long wait for a contractor. You can fix concrete garage floor cracks yourself with moderate skills and a few basic tools. The catch is knowing what caused the damage, so the split doesn't reopen a month later.
Concrete is durable but temperamental. These are the most common causes of garage floor cracking:
- Shrinkage: Concrete loses water as it cures, leaving hairline cracks in most new slabs.
- Freeze-thaw cycles: Water in a crack expands as it freezes, prying the concrete apart each winter.
- Soil settlement: Poorly compacted or eroding soil leaves voids, so sections of the slab sink and split.
- Sideways expansion: Concrete grows and shrinks with temperature, cracking wherever control joints are missing.
- Poor drainage and road salt: Standing water softens the soil below, while de-icers dripping off your car eat at the surface near the garage entry.
- Heavy loads and tree roots: Vehicles and nearby roots push on the slab from above or below.
The Right Conditions for Fixing Garage Floor Cracks Yourself
The general rule is simple: if the concrete sits at the same height on both sides of the crack, you can repair it yourself. A cracked, uneven floor, where one side is higher than the other, signals an underlying problem that needs an expert's eye.
Deal with obvious causes, like tree roots or standing water near the crack, before you patch. Otherwise, you'll be back in the garage doing the same job again.
Hairline Cracks in a Cement Garage Floor Are Mostly Cosmetic
Thin cracks in a cement garage floor show up in almost every home. These are safe to handle on your own:
- Hairline cracks narrower than 1/8 inch
- Random, spiderweb-style shrinkage lines
- Cracks that follow control joints, the straight grooves cut into the slab
- Cracks that haven't grown in several months
Warning Signs of Foundation Cracks in Your Garage Slab
Knowing when to worry about cracks keeps a small problem from becoming a structural one. Call a professional if you notice any of these:
- Large cracks wider than 1/4 inch
- One side of the crack higher than the other
- A gap that widens month after month
- Cracks running from the floor up into the garage walls
- A garage door that no longer seals evenly against the floor
- Water seeping up through the crack after rain
These point to foundation cracks in the garage, soil movement, or drainage trouble. Filler won't hold until the root cause is fixed.
Quick Tip
Lay a straightedge across the crack before you buy any supplies. If one side sits higher than the other, call a pro instead of reaching for filler.
Choosing the Best Crack Filler for Your Concrete Garage Floor
The right product depends on the crack's width and whether the slab still moves. Rigid fillers suit stable cracks, while flexible sealants handle joints that open and close with the seasons.
| Crack Type | Best Filler | Why It Works |
|---|---|---|
| Hairline (under 1/8 inch) | Liquid concrete crack filler | Flows deep into narrow gaps |
| Small to medium (1/8 to 1/2 inch) | Polyurethane or latex concrete caulk | Flexes with the slab |
| Wide or crumbling (over 1/2 inch) | Vinyl concrete patch or repair mortar | Rebuilds broken edges |
| Stable structural cracks | Two-part epoxy filler | Cures rock-hard under coatings |
| Expansion and control joints | Self-leveling polyurethane sealant | Stays flexible as joints move |
Getting Started: Clean and Prep the Cracked Garage Floor
Knowing how to repair cracks in a concrete garage floor starts with prep, because filler only bonds to clean, sound concrete. The job gets worse before it gets better: you'll actually make the crack bigger so fresh filler has solid edges to grip.
- Sweep the garage so you can see the full layout of the crack.
- Power-wash the area and squeegee away the excess water.
- Scrub oil and grease stains with trisodium phosphate (TSP). Our guide on how to clean your garage floor covers tougher stains.
- Widen the crack with a chisel, angling the cut so it's wider at the bottom than the top. This shape locks the filler in place.
- Pull out loose chunks, scrub with a wire brush, and vacuum the fine dust.
- Let the area dry completely, unless the product label says otherwise.
Extra Prep for Large Cracks and Deep Gaps in the Concrete
Deep, wide cracks are still a DIY job; they just take extra tools. Fit a circular saw with a diamond blade and cut grooves along each side to create a clean channel for the filler.
Wear a respirator, since concrete dust contains silica, and run a fan to push the dust outside. Then knock out any remaining chipped pieces with a maul and chisel.
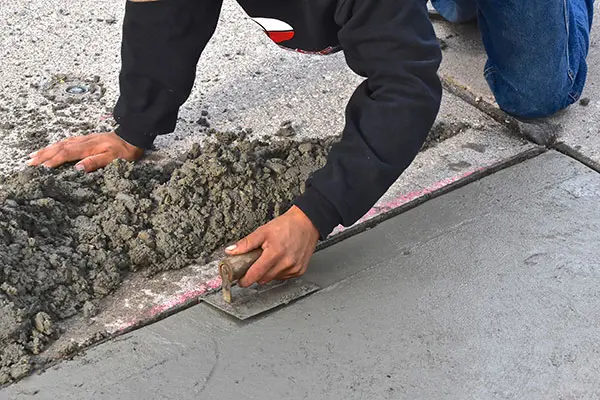
Filling in the Groove: Fill Cracks So the Repair Bonds Tight
With the channel clean and dry, it's time to fill cracks with your chosen product. Grab a concrete sealer too, since sealing is what makes the repair last. Some DIYers mix a latex modifier into cement-based fillers for a stronger bond.
- Press foam backer rod into any crack deeper than 1/2 inch, leaving 1/4 to 1/2 inch of depth for filler.
- Cut the nozzle and fill the crack slowly from one end to the other.
- Wait a few minutes for the filler to settle, then top it off.
- Smooth the surface flush with the floor using a putty knife or trowel.
Patience matters at this stage. Most fillers cure in a few hours, though overnight is better before anyone walks on them. Check the label for exact timing, and plan on 24 to 72 hours before parking on the repair.
Applying a Sealant to Protect Your Freshly Repaired Floor
Concrete soaks up oil, grease, and nearly anything else spilled on it. A sealant keeps stains out and limits the moisture that turns small cracks into big ones. Start with a clean cement garage floor, since sealer locks in any grime left on the surface.
A heavy-duty, water-based polyurethane sealant works well. It dries fast, so you can apply several coats in a day:
- On rough concrete, work the sealant in with a stiff-bristled broom.
- Smooth it out with a roller or squeegee.
- Apply a second coat after a few hours, following the label's recoat time.
- Add a third or fourth coat in high-traffic areas.
For product picks and prep tips, see our full guide to sealing concrete garage floor surfaces. Done right, a sealed floor resists stains and water for years.
Repairing a Cracked Concrete Floor Starts With the Root Cause
Small cracks are easy to repair, and you can handle bigger ones too. Just find out why they formed, starting with a look at your floor after a heavy rainstorm.
If the cause concerns you, talk to a professional. A consultation costs far less than repairs that keep failing. Once the root issue is solved, you can fix cracks in the garage floor with filler and sealant alone.
Coat or Resurface the Floor to Hide Repairs and Block Moisture
Patched cracks rarely match the surrounding concrete, so many homeowners finish with a coating or cover. Coatings also shield the whole slab from water, salt, and chemicals.
- Polyaspartic: A polyaspartic floor coating cures fast and resists hot tire pickup and road salt.
- Epoxy: A durable, budget-friendly option with a longer cure time.
- Concrete resurfacer: A thin overlay that restores pitted or flaking floors.
- Interlocking tiles: Snap-together tiles that cover cracks without bonding to the slab.
Finish all crack repairs before coating, since no coating can stop a slab that's still moving. Keep gutters and grading directing water away from the garage to slow future damage.
Get Started With Feldco for a Long-Lasting Garage Floor
Some cracks are a weekend fix, and some floors are ready for a full upgrade. Feldco's garage specialists can help you plan a floor that stands up to Midwest winters, road salt, and daily traffic.
We've built over 100,000 garages and served more than 500,000 homeowners across Illinois, Wisconsin, Indiana, and Iowa. As the Midwest's #1 home exterior company since 1976, we bring 50 years of trusted service to every project. Get your free garage flooring quote today.
FAQs
Are cracks in a garage floor normal?
Yes, hairline cracks are normal because concrete shrinks as it cures. They're only a concern if they grow wider than 1/4 inch, keep spreading, or leave one side higher than the other.
Why do garage floor cracks keep getting wider?
Water seeps into the crack, freezes, and expands, pushing the edges apart every winter. Road salt, settling soil, and heavy vehicles speed up the process.
How long does crack filler need to dry before you drive on it?
Most fillers handle foot traffic within a few hours, but wait 24 to 72 hours before driving on the repair. Repair mortars take longer, since the dry time for concrete-based products can stretch to a week.
How do you repair a wide expansion joint in a garage floor?
Clean out the old sealant, press in foam backer rod, and fill the joint with self-leveling polyurethane sealant. Skip rigid fillers like epoxy or mortar, because expansion joints need to flex as the slab moves.


 866-4FELDCO