


Summary
Replacing a garage door torsion spring takes two to four hours and costs roughly $80 to $150 in parts, against $200 to $300 for a service call. The job needs professional winding bars, locking pliers, a socket set, and eye protection. It's within reach of a careful DIYer, though a wound spring holds enough stored energy to cause serious injury when handled wrong.
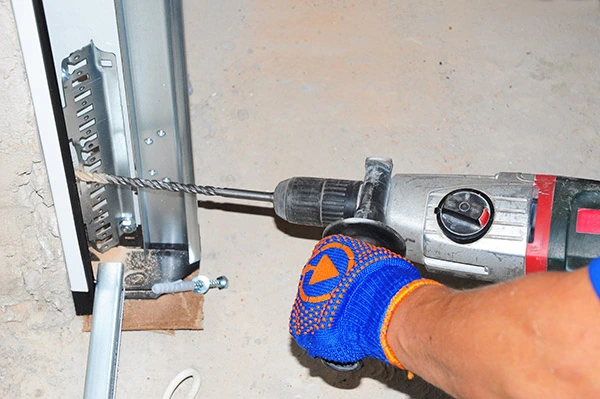
Garage Door Torsion Spring Replacement Costs and Timing
A fully wound torsion spring can throw a winding bar across your garage. Most tutorials skip that detail, and it's the reason this project deserves your full attention from the first turn.
Learning how to replace the spring on garage door hardware can save you $200 or more in labor. It can also cost you a trip to the ER if you grab the wrong tool or rush a safety step.
Get two or three professional quotes before you commit. Pricing swings by region, and hiring a technician sometimes works out cheaper once you count your own hours.
Plan on two to four hours for a first attempt. The decision comes down to what your Saturday is worth against the price of a service call.
Torsion Springs vs. Extension Springs on Your Garage Door
Look above the opening first. Torsion springs mount on a steel shaft bolted to the header, sit directly over the door, and twist to lift the weight.
Extension springs stretch along the horizontal tracks on both sides instead. They should have a safety cable threaded down the middle to catch the pieces if one snaps.
The two types use different hardware and different procedures. This guide covers torsion springs only. If yours run beside the tracks, the winding instructions below don't apply to your door.
Signs of a Broken Garage Door Spring You Shouldn't Ignore
A snapped torsion coil usually announces itself with a bang loud enough to wake the house. After that, the symptoms are hard to miss:
- A visible gap of two to three inches in the coil above the door
- The door lifts a few inches, then stops or drops back down
- The top panel bends or flexes when the opener pulls on it
- Lift cables hang slack off the drums or tangle on the shaft
- The door feels impossibly heavy when you raise it by hand
Signs Your Opener Is Straining Against Weak Springs
Springs fade long before they break. Listen for a motor that grinds, groans, or pauses partway up, and watch for a door that travels slower than it used to.
An opener is built to guide the weight, not carry it. Once tired coils shift that load onto the motor, the gears strip and you're paying for two repairs instead of one.
Tools and Materials for Garage Door Spring Replacement
Start by noting your spring's length and inside diameter along with the width and height of the door. Then gather everything before you climb the ladder:
- Safety gear: glasses & leather gloves
- Adjustable wrench & wrench set
- Clamps
- Proper winding bars
- Cordless drill
- Rags
- Socket/ratchet set
- Locking pliers
- Hammer
- Bottom brackets
- Double-life torsion springs (will provide more years of service and only cost a little more)
- Lift cables
How to Measure Garage Door Springs Before You Buy Parts
Four numbers decide which replacement you order. Get any one of them wrong and the door won't balance when you're finished.
- Wire size: measure across 20 coils, then divide by 20.
- Inside diameter: usually stamped on the stationary cone as 1 3/4", 2", or 2 1/4".
- Overall length: measure the coils alone with the spring unwound, skipping both cones.
- Wind direction: note which way each coil turns before you take anything apart.
Write the figures down and photograph the stationary cone. Suppliers ask for all four before they'll ship.
Identifying Left-Wind and Right-Wind Torsion Springs
Check where the end of the wire points. Aimed up toward the right, you have a right-hand wind; aimed up toward the left, it's a left-hand wind.
Doors with a pair always carry one of each, and they aren't interchangeable side to side. Mark the shaft before removal so the new set goes back in the same orientation.
Safety Setup Before You Touch the Torsion Spring System
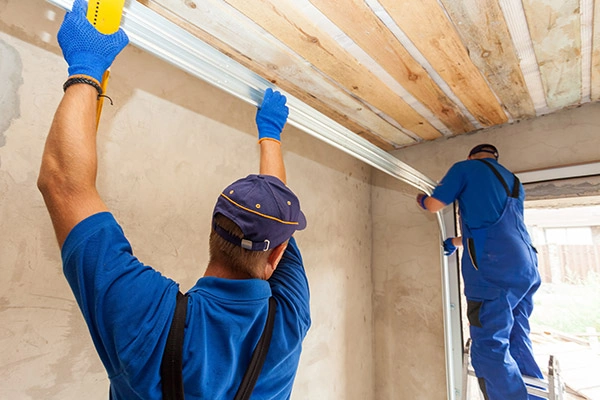
Close the door and lock it down. Clamp locking pliers or a C-clamp onto the track just above one of the rollers so the panel can't spring upward while you work.
Unplug the opener at the outlet, then pull the emergency release cord to disconnect the trolley from the door arm.
Put on eye protection and leather gloves before anything else. Use professional-grade winding bars only; a screwdriver, pin punch, or pair of pliers slips out of the cone and turns into a projectile.
Set your ladder off to one side. Standing in front of a wound spring puts your face in its path.
The Don'ts of Replacing a Garage Door Torsion Spring
- Don't use tools like a screwdriver or pin punchers to wind or unwind the spring
- Never place a ladder in front of the spring when winding or unwinding it
- Don't have your garage opener hooked up to power
- Never test the garage door while you're on the ladder
- Never work on springs without eye protection and gloves
How to Remove Garage Door Spring Tension Step by Step
- Mark the shaft where each cone sits, and draw a line across the drum and shaft for reference.
- Insert a winding bar into the bottom hole of the winding cone and hold it firmly in place.
- Loosen the two setscrews while keeping pressure on the bar. Expect it to kick as tension releases.
- Slide the second bar into the hole at the 9 o'clock position, then pull the first one out.
- Alternate the bars to unwind a quarter turn at a time until the coil goes completely slack.
With tension gone, unbolt the spring from the center bracket and slide it toward the end bearing plate. Clamp the shaft with locking pliers so it can't rotate.
Loosen the setscrews on both cable drums and unhook the lift cables. Slide each drum off, work the shaft free, and pull the old spring away.
Choosing Replacement Springs, Cables, and Bottom Brackets
Hardware stores rarely stock the exact part you need, and most garage door companies won't sell components to homeowners. Online suppliers are the practical route for a DIY spring replacement.
Torsion springs run $40 to $65 apiece. Bottom brackets cost around $15 per set, and quality lift cables about $12 per set.
Spend the extra few dollars on double-life coils. A standard unit is rated for roughly 10,000 cycles; the upgrade doubles that, which matters on a door you open four times a day.
Spring Tip
Replacing both torsion springs at the same time saves you a second repair down the road. The surviving coil has logged the same number of cycles and is close to failing too.
Installing New Garage Door Springs and Lift Cables
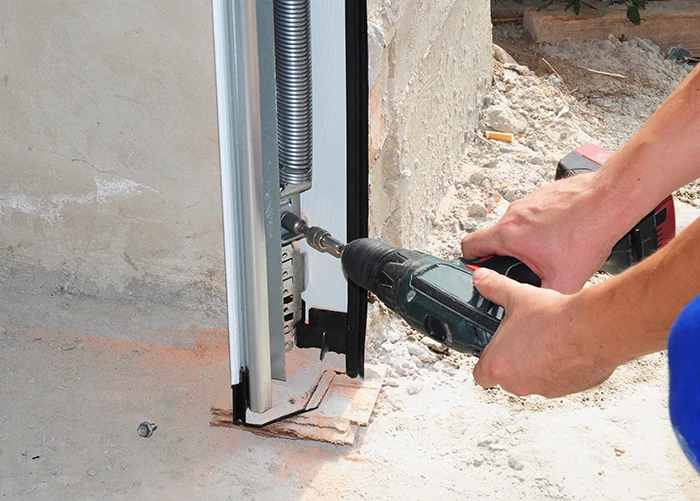
Slide the new spring onto the torsion tube with its stationary cone facing the center bracket. Reinstall the cable drum and feed the shaft back through the end bearing plate.
Fit a fresh center bearing next. Guide the tube into the center bracket while sliding the second spring on, seating the bearing against its stationary cone, then bolt both cones to the bracket.
Installing new rollers, cables, or bottom brackets? Handle that now. Snap the lift cable into the bracket, set the roller in place, and run the cable up between the roller stems and the doorjamb, dropping the cable stop into the slot on the drum.
Lock the tube with pliers, rotate each drum to pull the cable taut, and tighten the setscrews. Match tension on both sides so the door doesn't rack in the tracks.
How to Wind a Torsion Spring Safely Without Slipping
Winding is where most injuries happen. Keep both feet on the ladder rungs, stand to the side of the coil, and never release a bar that's carrying load.
- Insert a winding bar into the cone and lift a quarter turn with a firm grip.
- Hold that position, slide the second bar into the next hole, and withdraw the first.
- Repeat to the manufacturer's count, which runs about four full turns per foot of door height.
- Tap the bar outward to stretch the spring roughly a quarter inch so the coils don't bind.
- Tighten both setscrews a half turn past snug against the flat of the shaft.
Finish by spraying the coils with garage door lubricant and wiping off the excess.
Balancing and Testing the Door After Spring Replacement
Clear every tool off the torsion tube, the track, and the floor. Take the clamps off the rails.
Lift the door by hand to waist height and let go. A balanced door holds its position without drifting either direction.
Sinking means the springs need more tension, so add a quarter turn to each side. Creeping upward means you overwound, so back off a quarter turn on both.
Check again at knee height and just below the header. The panel should stay put at all three positions before you call the job done.
Reconnecting the Opener and Restoring Normal Operation
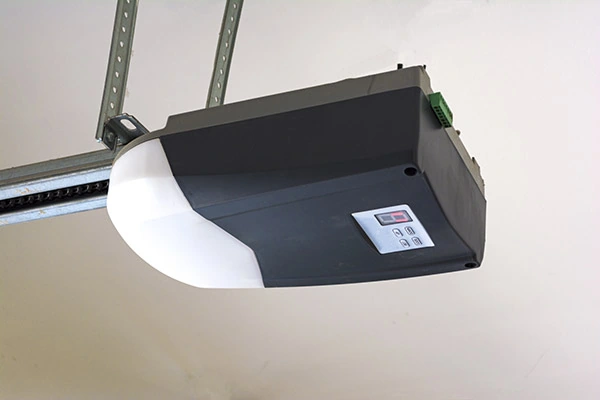
Plug the opener back in and pull the release cord to re-engage the trolley. Run the door through a full cycle and listen for grinding or hesitation.
Reset the force and travel limits if it stops short or reverses on its own. Then lay a 2x4 flat across the opening and close the door onto it; the safety reverse should trigger on contact.
Wave a broom handle through the photo eyes on the way down to confirm the sensors still halt the panel. If either check fails, keep the opener unplugged until both garage door safety features respond correctly.
Common Mistakes That Wreck a Garage Door Spring Repair
- Substituting screwdrivers or rebar for real winding bars
- Ordering by length alone and ignoring wire size and inside diameter
- Changing out one coil on a two-spring door and leaving the pair mismatched
- Loosening bottom brackets while the cables still carry tension
- Working under a raised door with no clamps on the track
Replacing Springs on a Heavy Double Car Garage Door
A 16-foot insulated panel can weigh 300 pounds or more, and it rides on two coils that must be wound evenly. Uneven tension drags one side up faster and binds the rollers.
Wind each spring to the same count, then check balance at three heights. If the door twists as it travels, stop and call a technician instead of forcing it.
How to Make Your New Garage Door Springs Last Longer
Spray the coils with a silicone or lithium garage door lubricant twice a year. Hit the rollers, hinges, and bearings during the same pass.
Run the balance test every spring and fall. A door that starts drifting is telling you the hardware is fading before it snaps.
Keep the tracks clear of debris and inspect the cables for fraying. Small fixes now beat a broken spring on a January morning.
Detached Garage Projects Worth Planning After the Repair
New springs restore the door, but they won't fix a tired structure around it. When your garage is showing its age, a rebuild starts with clearing the old structure and pouring a fresh garage foundation.
Some jobs are worth handing off. Feldco has served more than 500,000 homeowners across Illinois, Wisconsin, Indiana, and Iowa, and has been the Midwest's number one home exterior company since 1976.
Talk with a product specialist about a replacement door or professional spring service. Get your free quote today.
Garage Door Spring Replacement Questions Homeowners Ask
Is it dangerous to change garage door springs yourself?
Yes. A wound torsion spring stores enough energy to break fingers or launch a winding bar, and most injuries trace back to someone using the wrong tool. Proper bars, gloves, eye protection, and clamps on the track cut that risk sharply.
What happens if you use the wrong size spring on a garage door?
The door won't balance. An undersized coil leaves it too heavy and overloads the opener, while an oversized one sends the door flying up into the header and stresses the panels.
Can a single person replace a double-wide garage door spring?
Yes, as long as clamps hold the door in place and locking pliers secure the torsion tube. A helper earns their keep during the balance test, when you're lifting the full weight by hand.
How long do garage door torsion springs last?
A standard spring is rated for about 10,000 open-and-close cycles, which works out to seven to nine years for most households. Double-life versions push that to roughly 20,000 cycles.
How long does replacing a garage door torsion spring take?
A technician finishes in 30 to 60 minutes. Budget two to four hours for a first DIY attempt, since measuring and sourcing the right parts add time before the work starts.


 866-4FELDCO