5 Steps You Should Take When Dealing with Broken Shingles
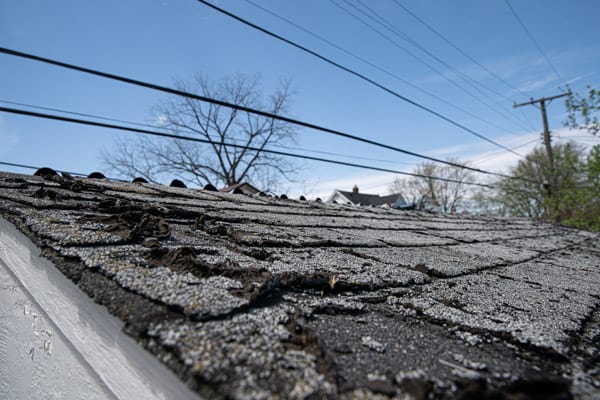
There’s no question that broken shingles can lead to serious roofing problems. Once water has an unobstructed path and finds its way underneath a shingle, the underlayment of the roofing system can become compromised. Exposure to moisture means water damage and water damage can mean structural and foundational issues when it’s not addressed.
Fixing broken shingles can be a DIY project but you’ll want to do your research beforehand if you’re unfamiliar with fixing them. Here are 5 steps you should take when faced with broken shingles that will ensure you and your roof remain protected:
1. Check the Weather
Climbing on top of your roof is already a hazardous task but attempting to fix broken shingles at that height in foul weather is not just a bad idea, it’s an incredibly dangerous one. Even on a windy day you could fall or slide and hurt yourself.
Following roof safety guidelines is the very first thing you should do when dealing with broken shingles or any roofing problem. Weather is a huge factor when it comes to roof safety. If you’re planning on tackling broken shingles, choose a day with fair weather. That means low winds, some cloud coverage to prevent the shingles from becoming too hot, and no rain, snow, or other adverse weather.
2. Gather Your Materials & Safety Gear
Replacing a broken shingle can be a DIY project—and it’s a relatively quick process if you plan accordingly. Part of your planning should involve gathering all of your materials needed to deal with the broken shingle as well as roofing safety gear. Climbing on the roof is dangerous, so you’ll want to be equipped with the right materials to prevent any accidents.
You will need the following materials to fix a broken shingle:
- Shingle nails: either galvanized, stainless steel, or waterproof roofing nails
- Sealant
- Hammer
- Shingle ripper
- Drill
- Replacement shingles
- Pliers or a pry bar (optional, for stubborn shingles)
You will need the following safety gear for working on your roof:
- Durable work gloves
- Sturdy boots
- A high-quality ladder (remember to follow the appropriate ladder usage to prevent falls and accidents)
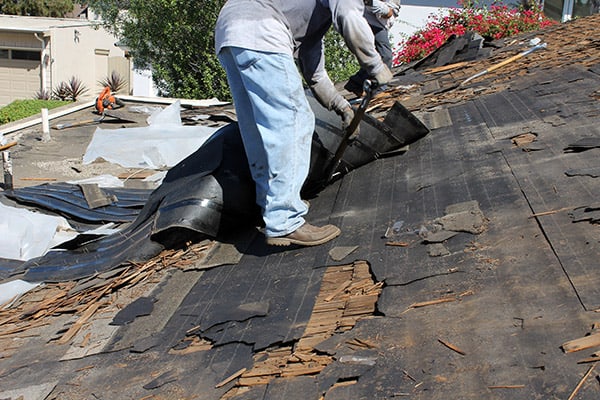
3. Removing the Broken Shingle
Now it’s time to remove the broken shingle and begin your repairs. Use your shingle ripper by sliding it beneath the middle of the broken shingle. The blade of the shingle ripper should not be visible as you center it beneath the shingle. Cock the shingle ripper to one side and lift until you can feel the tool free one of the roofing nails that’s holding the shingle in its place. Standard practice is to apply four roofing nails to secure a shingle onto the roof, but you’ll just need to hook one with the ripper at this stage.
4. Sliding Out the Old Shingle
Next, take your hammer and begin hammering on your ripper tool where the blade meets the handle. This will remove the fasteners as well as the broken pieces of the shingle with minimal effort. It’s okay if the nail breaks, you’ll be installing new roofing nails when you replace the broken shingle.
Some shingle are difficult to remove. If that’s the case, try rocking the ripper side to side and removing the nails with a pair of pliers. You can also try using pliers to grab the end and apply force with a hammer to help remove the shingle.
5. Replacing and Sealing the New Shingle
Once the broken shingle is completely removed, you’ll have a gap in the roof. Measure this gap and subtract about a half of an inch from your measurement. Find a shingle that size to fit in the gap. By taking off a half of an inch, you’re allowing enough space for the shingle to expand and contract in warm and cold temperatures. If you only have shingles that are wider than the measurement, you can take a utility knife and break off the excess. You can then smooth the shingle with a block plane or utility knife.
Slide your new shingle into place. The end should be about a half-inch longer than the adjacent shingles. Now, hammer a shingle nail one inch into the shingle’s side. Drive the rest of the roofing nails into the shingle’s surface with your hammer. You can also angle the nails to help secure the shingle in a better position. Don’t hammer in your shingles too tightly.
Use a block of wood to place overtop the new replacement shingle and finalize securing the shingle into place. This prevents damage to the shingle. If you want, you can apply sealant around the nails to create a seal that will prevent water damage from seeping in.
When in Doubt
If you’re new to fixing broken shingles or just want to outsource the project, call a professional roofing contractor. Your roof, if replaced recently, may have a warranty on the shingles and your contractor can stop out and replace the ones that are broken. New roof replacements typically produce extra shingles that your contractor will give to you for replacing shingles if they should become damaged.
Replacing your roof can be an expensive upgrade to your home. Let us help you in making that decision. At Feldco, we provide a breakthrough design and triple layer protection to keep your roof healthy for what mother nature decides to throw at it. For a roof replacement, our installers are factory trained, experienced, and professional to get the job done right. Speak to a product specialist and get a free quote today.