How to Caulk a Window Yourself
Simply put, we all want to keep the outdoors outside of our homes and the indoors inside. Every home, no matter how new or old the windows are, can experience air leaks that happen over time. Those leaks can cost you in energy bills and could make your home less comfortable to live in. That’s why it’s important you learn how to caulk a window.

By learning how to caulk a window, you’ll save yourself money, time and ultimately, a huge headache. Plus, your windows will look great once you are done.
There a few important steps to take when caulking your windows to produce professional looking results. Performing these steps will provide you with the results you are looking for. Read on to learn the steps of how to caulk a window.
1. Buy the Correct Caulk
Choosing the correct caulk is the first step. There are two types of caulk that are typically used for caulking windows: latex and silicone. Both have their advantages and disadvantages depending on what benefits you are looking for your caulk to provide.
Latex Caulking
Latex is a good choice because it can be easily applied and easily removed when the time comes. It can also be painted to match the rest of your window or your home.
However, it does not last very long and will have to be replaced frequently. It also does not expand and contract with your window, which may cause cracking and pieces falling off in the future.
Silicone Caulking
Silicone is the more common caulk material chosen when it comes to caulking windows. This is because the material is very flexible, so when your home expands and contracts with heat and cold, the caulk will as well. This eliminates the possibility of the caulk cracking and falling apart. Since the caulk is flexible, it can last for a long time and requires less maintenance and replacement.
One downfall of silicone caulking is that it’s difficult to work with. It requires more skill to apply properly. It also cannot be painted but does come in different colors to match the color scheme of your window.
Siliconized Latex Caulking
Companies now make caulks that are a combination of the two materials. They are often called “siliconized latex” or “latex plus silicone.” These combination caulks offer the ease of use of latex but the durability of silicone.
2. Weather Watch – Best Weather Conditions to Caulk Windows
Now that you’ve picked out your caulk, make sure the weather conditions are ideal. If you caulk your windows while the weather isn’t cooperating, your caulking job will be subpar no matter how well you apply it. So, what exactly is the ideal weather?
Pick a day where the temperature isn’t too hot or too cold. For example, anything over 90º F is too warm and anything lower than 40º F is too chilly. Mild weather is perfect because it will prevent the caulk from freezing or from melting as you’re working with it.
Additionally, choose a relatively dry day to caulk your windows. Snowy or rainy conditions will not work in your favor since it will prevent the caulk from sticking properly. Not to mention, they are difficult conditions to work in, in general.
It’s important to note that you should hold off caulking your windows if the forecast predicts rain or snow within the next couple of days. You want to give your caulk enough time to properly dry.
3. Prep Your Window
Now that you’ve chosen a dry, warm day to caulk your windows, it’s time to prep them before you do any work. Good preparation is key in achieving a long-lasting caulk job.
Remove Old Caulk
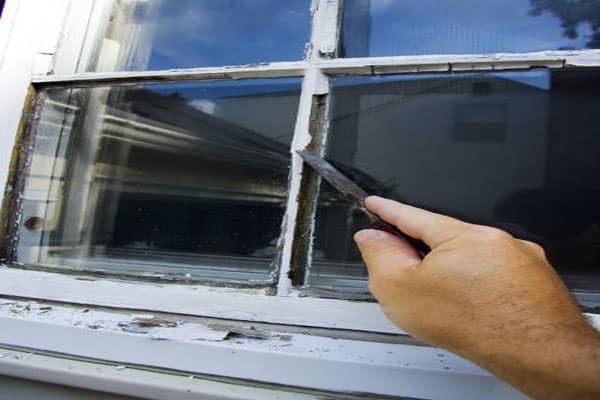
Never caulk over old caulk! This will affect the efficiency of the new caulk you apply on your windows. Removing old caulk is an easy but vital step.
Use a razor blade or putty knife and slowly scrape off the old caulk. Use a heat gun or hair dryer to heat the old caulk to make it easier to remove and pull off. Also, caulk remover solution can assist in the easy removal of old caulk by breaking down the material. Both a heat gun and caulk remover can be found at your local hardware store.
Clean the Surface
After all the caulk has been removed, wipe down with a dampened sponge or rag to get rid of any left over caulk or caulk remover. Now that the area is clean, dry everything with a clean, dry cloth. The final step is to brush off any remaining residue, dirt or debris from the window sill and edges with a bristled brush. Bristled brushes can be found at any local hardware store at affordable prices.
Prime Your Windows
Priming the surface before caulking is an optional step. It isn’t required but it will help adhere your caulk to the window, especially in more difficult caulking areas. Any paint primer will work.
4. Apply the Caulk
It’s finally time to lean how to caulk a window. Follow these steps in order to achieve caulked windows that look great and save you on energy costs.
Cut the Nozzle to the Right Size
Most caulk cartridges come with markings on the nozzle that correspond to different bead or caulk line sizes. Cut the nozzle at a 45º angle at the bead size you feel will work best for your caulking job. You want to make the opening angled at 45º because it will be easier to caulk harder to reach places. Place the cartridge in a caulk gun and you’re ready to begin. Caulk and caulk guns are easily found at any hardware store and vary in price depending on your needs.
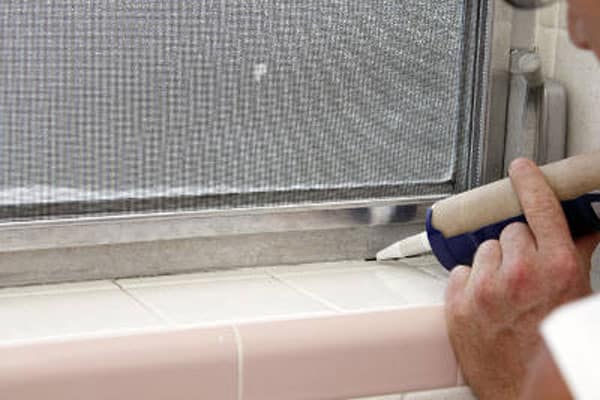
Caulk the Window

Start your first line of caulk in an area that is not well seen because if you mess up, it won’t be that noticeable. Hold the nozzle opening parallel to what you’re caulking and apply a 2-3 foot bead (or line of caulk) and keep an even pressure on the trigger as you go along. This is will spread the caulk evenly. It’s important not to distribute more than a 2-3 foot line of caulk because you’ll need time to smooth it before it starts to dry.
By the time you get to those areas that are more noticeable, you will have developed more skill and the result will look better. If you do mess up, scrape out the bead quickly, wipe down the surface and start over.
Smooth Out the Bead
As you go along, it’s important to smooth down the bead. You can do this by gliding your finger over the line of caulk. If you don’t want to use your finger, the back of a spoon or a flat spatula will both do the job sufficiently.
This will make the caulk job look neater and will provide more adhesion. Avoid scraping too much off as you are smoothing the caulking. It will waste the caulk and you will have to redo the area.
Clean Up Any Messes
Clean up any messes that occur right away. Dried caulk is hard to remove so keep a rag handy to clean any messes as they happen.
You can use masking tape around the caulk area to minimize the amount of mess you make. However, make sure to remove the tape quickly so the caulk can dry in a smooth, even line.
Let Caulking Dry
Now that you have finished caulking, it’s important to let the caulk dry 24 hours. Do not touch the caulk as it’s drying because it will leave finger prints and dents in the caulk. Properly dried caulk will leave you professional looking results.
You Now Know How to Caulk a Window
After you have finished each step, it’s finally time to enjoy your freshly caulked windows and the benefits they will provide. By learning how to caulk a window, you’ll be able to save yourself some money getting professional looking caulked windows without breaking the bank.
We have many showrooms across the Midwest and that’s why we have helped over 500,000 homeowners with their home improvement goals. Speak to a product specialist and get a free quote online today.